Saturday, March 29, 2008

Headstock finishing Step 1

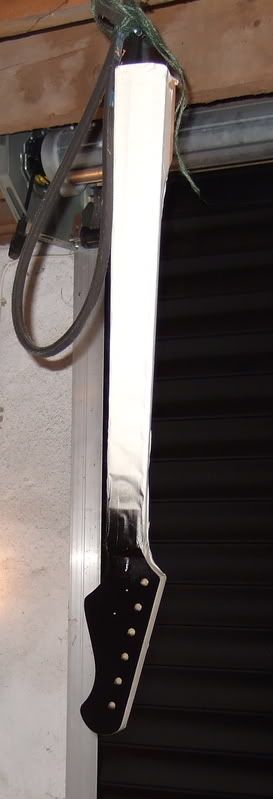
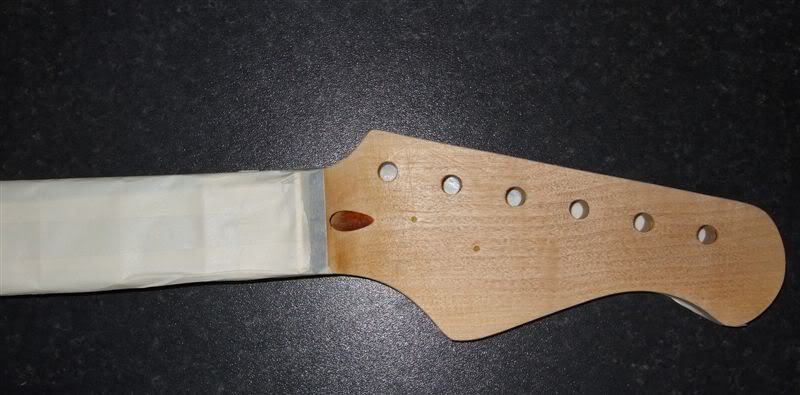
First step was to remove the hardware and sand off the finish from the headstock, then mask the sides and the neck to protect from the spray paint.


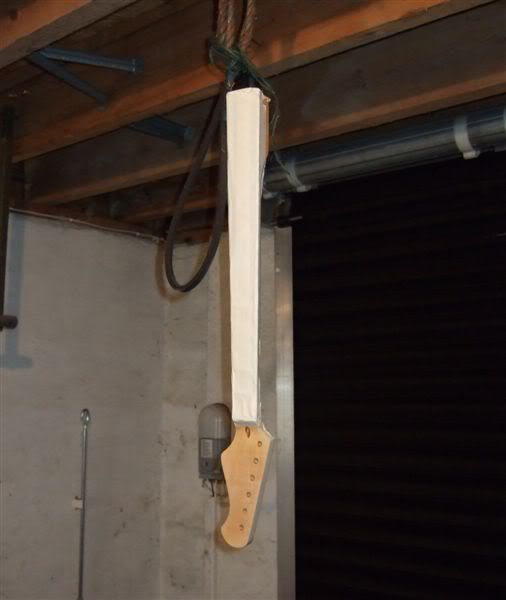
Having sanded in the kitchen and made a heck of a mess I decided I should retire to the garage for the next steps. Unfortunately all is not as slick as it seems : when looked at closely the paint shows up terrible sanding marks. My slap-dash preparation make it look quite bad. Ever the lazy oik I have decided to allow this coat to dry fully before rubbing back a bit and trying to build up layers, although I suspect I may end up starting again on the headstock finish. We'll see . . .

The body has arrived

The body arrived today. I'm pleasantly surprised at how light it is.


The rear is 2 pieces of centre-jointed mahogany with an extra wing for the bass-side 'wing' - all very neat and professional.


The top is a centre-joined piece of spalted-maple (it's all one piece including the edges where the figuring gives way to plainer maple). The spalt is indeed very soft so I can see why it has to be stabilised before being worked or finished. Bloomin' gorgeous though.

Friday, March 28, 2008

Headstock logo

Well the body didn't show up this week so this weekend I will sort out the neck. Headstock will be sprayed black and I'll make a logo for it like this :

Photobucket

Wednesday, March 26, 2008

The budget so far

ok, my budget:

Body £48.00
Neck £20.00
Pickup £0.00
Bridge £0.00
Strap buttons £0.00
Neckplate £0.00
Cyanoacrylate £6.50
Volume pot £0.00
Jack socket £0.00
Wire £0.00

Total £74.50

Available £25.50

Anything shown as £0.00 is either already lying around in a drawer, has been swapped for something I already had, or has been donated by a member of the MusicRadar Forums

Research in to body finish

Well it seems that lovely as Spalted Maple looks it takes some stabilising before it can have a finish applied. Asking around on the Project Guitar Forums reveals that Cyanoacrylate (yes, good old superglue) is the best bet. Needs to be obtained in a bulk quantity and applied (quickly!) with a credit card or spatula (make that quickly and carefully - outside with a fan blowing across it is advised it seems) before allowing to harden and sanding back. And then another coat.

Superglue eh, who'da thought . . .

Oh and on the subject of the body apparently it only got posted yesterday on a 5 day parcel service - so I'm losing a week on the most critical part of my build.

The neck arrives


A very pleasant surprise was in store when the neck arrived : it's in brilliant condition, in fact practically as new. As it is complete with tuners, nut and truss rod all I should need to do is wire-wool the back of the neck (as is my preference on lacquered necks) and I will probably remove the finish on the headstock (logo and all) and decide on something suitable when I see the body in the flesh.

Monday, March 17, 2008

This is going to be harder than I thought

I've been having a little think. All that routing that needs to be done . . .

Front:

  1. Rout for pickup(s)
  2. Drill bridge post holes
  3. Drill control shaft holes
  4. Rout for jack socket on front or side
Rear:
  1. Rout for control cavity
  2. Control cavity cover
And that's before we talk about the neck pocket . . .

First part sourced : the body. Plus some ideas.

Now to tell the truth I'd stumbled across this part-made body on eBay a few days ago and admired it. I'm not normally a fan of the Explorer body shape but the excellent spalted maple top on this one caught my eye.


When I checked back the auction was finished but it had been re-listed at a reduced price : £40 + £8 shipping. Click. Done. What have I let myself in for ? :-)

But what to do with it ? Well, clearly there are no routes for pickups or the neck, and all the drilling needs to be done. Which is more than a little daunting for a mna who owns no more than the odd screwdriver and an electric drill. Still - I've got a month to sort this out. Ample time . . . right ?

Now if memory serves me right I have a pair of gold-covered humbuckers removed from an old Epiphone, as well as the pots, wiring, bridge and tailpiece from that guitar. With an oiled or clear finish this spalted beast might just pull off the bling look with that gold hardware.

So parts-wise what does that leave me needing ?
  • A neck (!)
  • Tuners
  • Knobs
  • Strap buttons
  • Laquer or Oil
  • Jack socket
  • And access to a router and/or pillar drill


The Original Challenge

This started as an idea suggested by frankus on the MusicRadar Forums : With a 1 month deadline and a maximum budget of £100 who could create the best/most interesting/most valuable guitar. A few basic rules were formed namely:

  • £100 is the upper limit for outlay
  • Any existing 'spares' must be charged to yourself at cost
  • Genuinely donated parts are allowable at zero cost

With the gauntlet thrown down I started racking my brains for what spare parts were lying in various drawers at home and fired up eBay for a look around . . .